The world of animation has expanded and transformed over the past hundred or so years to include various digital processes as well as more traditional methods.
The type of animation in this tutorial is stop-motion animation and it’s one of the oldest tricks in the book. The quirky fluttering movements of the characters created by this style of animation mean it is used and loved by amateurs and professionals alike to this day.
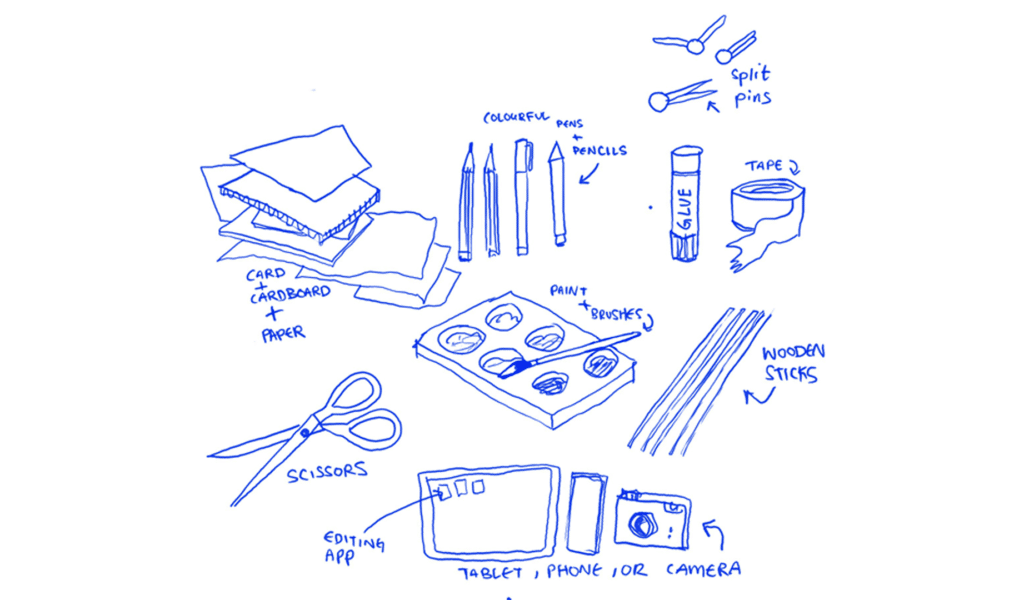
The tools you will need to complete this tutorial are:
- Card
- Cardboard
- Coloured pencils/markers
- Paint
- Scissors
- Tape
- Glue
- Split pins
- Wooden sticks/twigs/paper straws
- Camera (can be on phone or tablet)
- Editing app (on tablet, phone or computer)
Stop Motion Animation
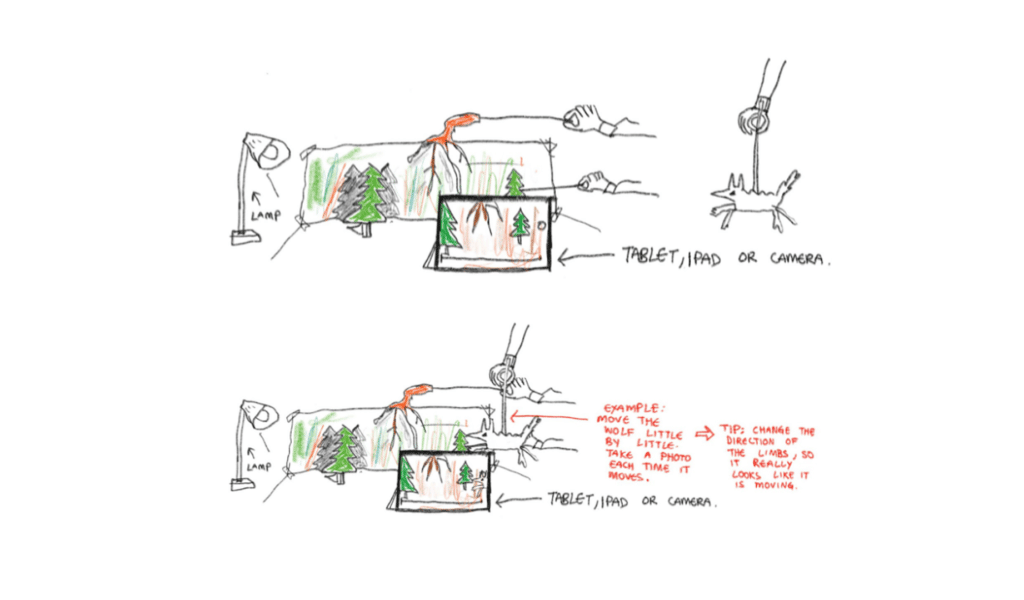
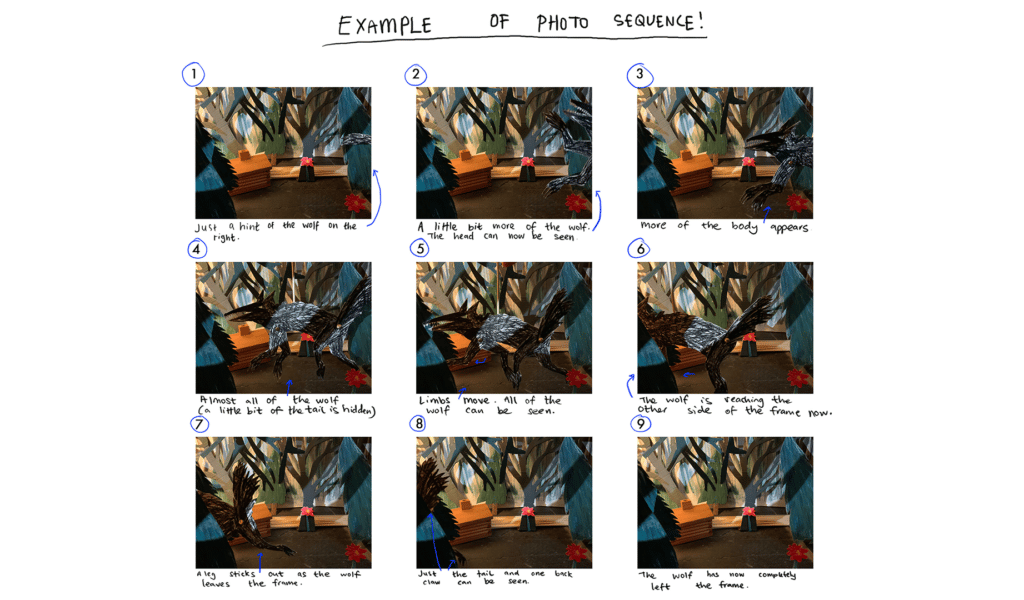
The basic principle of stop-motion animation is that you take a series of photos, which, when put one after another in quick succession, create the illusion of movement. In practice, this means creating a miniature scene and characters using the tools above, then taking a picture using your choice of camera, adjusting the character ever-so-slightly, taking another picture and so on.
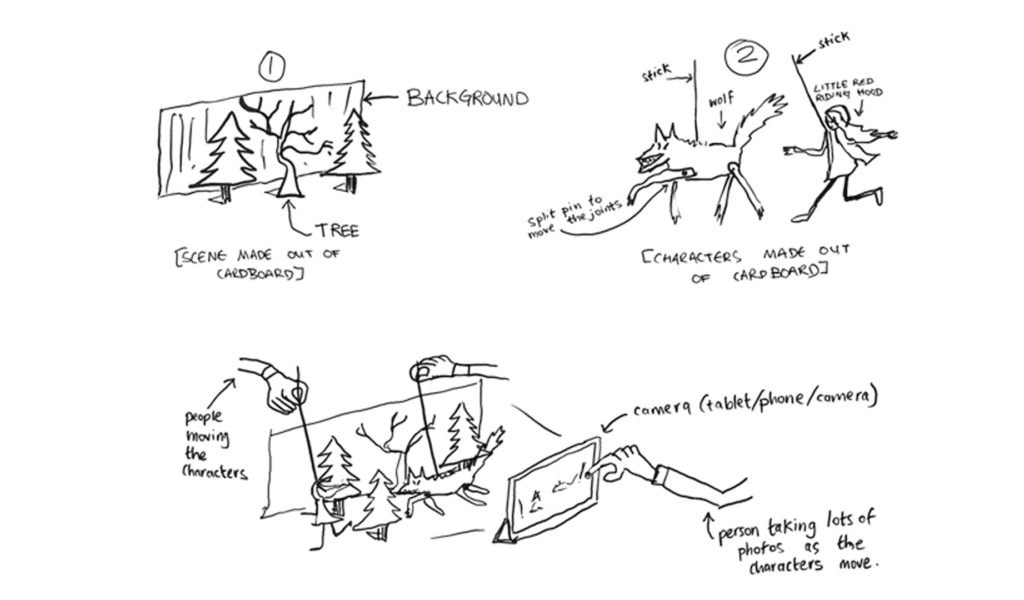
Use your card, cardboard, paints and pens to draw out your characters how you want them, then create some cut-out figurines to use as our puppets. Then, create the backdrop for the puppets to move around in. A more detailed tutorial will follow below. Don’t be afraid to get creative with it and put your own spin on the feel of the story!
Try to picture the overall mood and look of the animation you want to create, as well as how you can use these things to tell the story. For example, by using dark colours for the background in the forest scene, the feel of this scene becomes scarier. So, we can use this to show a scary moment in the story. Here are some questions about choices you could make to get you thinking:
Which scenes stand out to you?
Which characters do we want to introduce?
Do we want it to be scary or funny?
What do the woods look like?
What does Grandma’s house look like?
What do the characters look like?
To make this animation, you will need to create some scenes and characters out of card/cardboard/paper.
Then, you will need to use your camera to take lots of photos of these scenes with the characters. For each photo, you will need to move the characters a tiny bit, so when the photos are put together, it looks like it is moving!
Characters
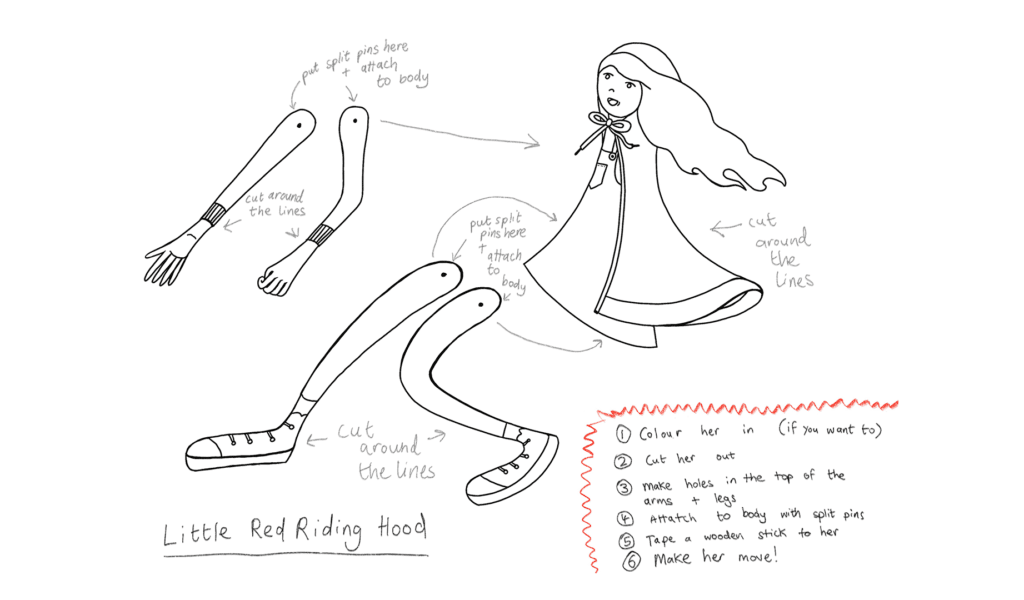
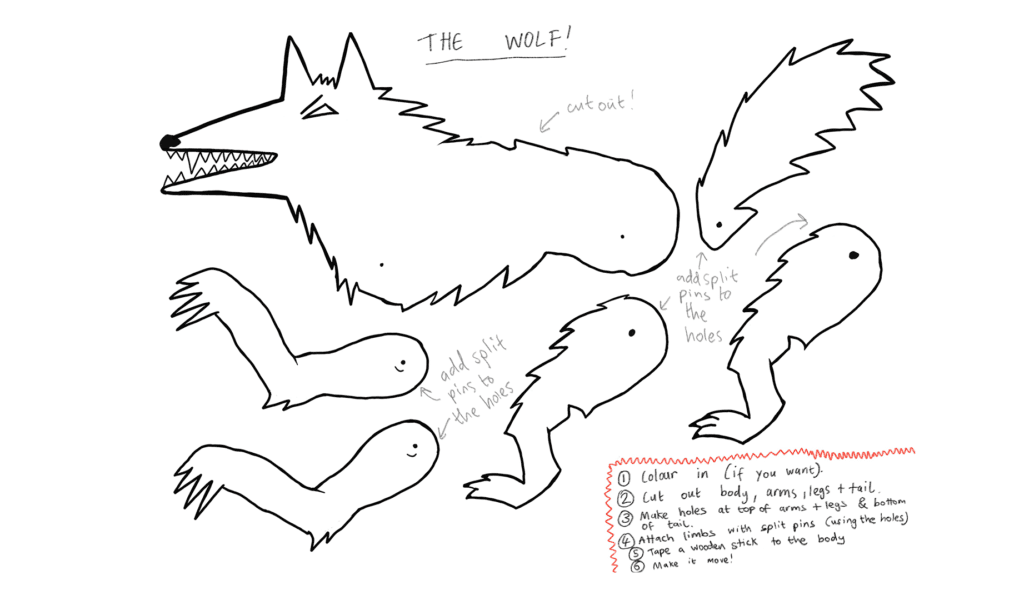
We’ve provided templates for Little Red Riding Hood and the Wolf, but you might want to design your own characters instead.
Activity
Design a character using the following instructions.
- Draw your character on the card. Draw the body, then draw the arms and legs separately.
- Cut them out.
- Colour them in
- Make holes in the joints, then attach the arms and legs to the body with split pins.
- Attach your character to a wooden stick with tape.
- They’re now ready to move!
Backgrounds
Activity
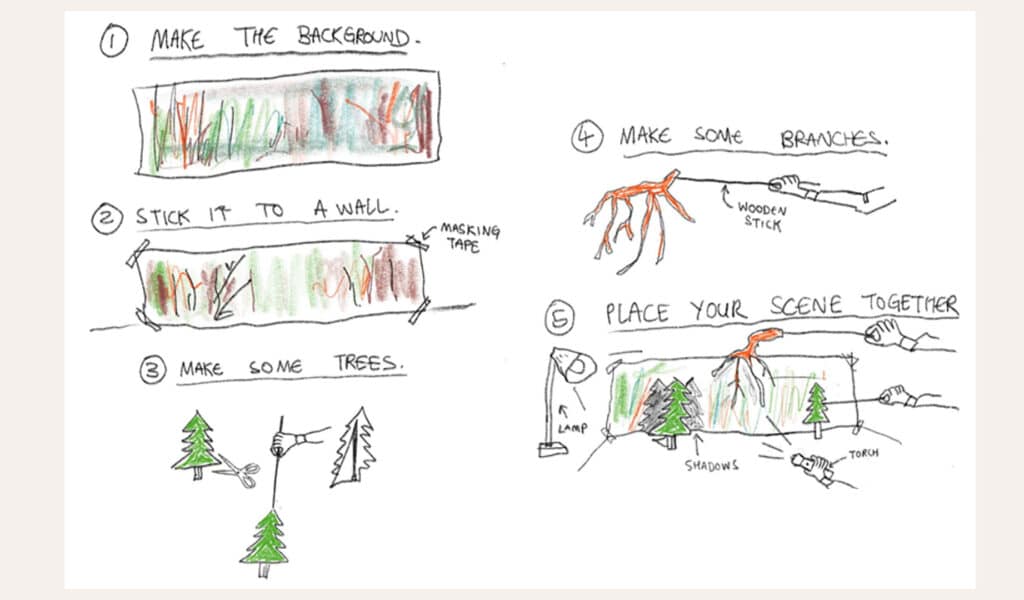
Design a background for the animation. Close your eyes and picture yourself in a forest. Branches, leaves, mud. Let’s try to recreate this for our backdrop in as much or as little detail as you would like. Get a long piece of paper and use marker and pen lines to create branches. Try to include different textures if you can.
Once finished, tape your background to a wall, where the wall meets the floor. This is where you will position your characters and props.
Scenery
Activity
Let’s make some trees to place in your forest. First of all, draw some trees on your cardboard. These are the ones which we will be cutting out and bringing closer to the camera, so you could try making them more detailed than the ones on the backdrop. Alternatively, use big blocks of colours on these trees to contrast the busy feel of the backdrop.
When ready, cut them out, as well as a cardboard triangle roughly the height of your trees. Glue the triangle to the back of the trees to make them stand up on their own. You can also tape a stick to the back of the trees, so they can be moved around more easily later on.
You could also make some spooky branches out of the cardboard. Tape a wooden stick to the back of them so they can be moved around.
Use torches or lights to add some spooky shadows! You could also add birds, flowers, grass, anything! The more layers, the better!
Which app to use?
Stop Motion Studio (Pro Version) is the easiest app to use. It’s available for both Apple and Android and costs £4.99. The pro version allows you to add music, save and share the final video. Here is a useful tutorial which explains how to use the app:
To add music to the animation, make sure the track is saved onto your device and follow this tutorial video.
There are other apps available such as Splice, Movavi Clips or Premiere Rush. You could also import the photographs to a computer and use other editing software such as Adobe Premiere Pro, Adobe After Effects, iMovie, Movie Maker, Movavi and many more.
You can download our music track to use in your own video! Click the button below to listen to the track, and click the three dots on the player to download.
listen & download music track